How to Take Photos in the Rain
By Anna Jones,
12th September 2025, 10 min read
Wet and rainy days could seem challenging to photograph but they offer a unique opportunity to capture dramatic, moody and atmospheric photos as long as you know how. This guide will run through how to make the most of the conditions, essential tips for protecting your camera equipment, including camera insurance, as well as compositional ideas so you can make the most of rainy days.
Keep Your Camera Equipment Dry
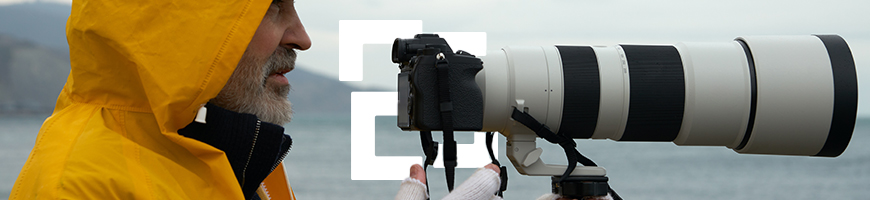
Before heading out into the rain, you need to ensure your camera equipment is prepared as although lots of modern cameras are weather sealed, they’re not waterproof. This means sudden downpours can cause long-lasting damage. Luckily, there are lots of rain protection options for cameras:
- Camera Rain Cover: Purpose-built waterproof covers are the safest option and are available in different sizes to fit different bodies and lenses. Something to consider though if you’re a wildlife photographer is how much noise they make.
- DIY Rain Sleeve : You could take a plastic bag and place it over your camera body and lens. Secure it with an elastic band or some tape and cut a hole for the lens. You could also add a lens hood for additional protection.
- Clear Filter: This helps to protect your lens element from water spot and scratches.
- Microfibre Cloths & Towels: Keep these to hand so you can quickly wipe raindrops away.
- Umbrella: Standing under a large umbrella can also work well but may be easier if you are using a tripod. Tripods with rubber feet are best as they’ll provide stability on slippery surfaces.
If it’s both windy and raining, avoid facing directly into the wind. Not even the best rain covers will be able to keep your camera completely dry if the rain is blowing sideways.
Keep Yourself Dry
If you're cold and wet, your motivation for shooting the rain will quickly fade. Avoid this by dressing yourself as well as your camera.
Consider a waterproof jacket and trousers - not just water-resistant as well as opting for sheltered locations such as overhangs, trees or gazebos as these allow you to keep shooting whilst staying dry. You could also shoot through windows for creative compositions without getting wet.
Camera Settings for a Rainy Day
Rainy days can mean large clouds, grey days and in general less light. A few small adjustments to your camera can make all the difference, allowing you to still capture crisp, sharp and atmospheric photos.
ISO
As rainy days tend to be dark and cloudy, you will need a higher ISO to compensate for the lower light. We suggest you start with an ISO of around 400–800.
If it's really dark you can increase this up to ISO 1600 but be careful this doesn't result in grainy, noisy photos.
Aperture
Use a wide aperture (f/2.8–f/5.6) to let in more light and create a shallow depth of field which can blur raindrops or the background, making something in the foreground pop.
If you're shooting landscapes or scenes where you want more detail opt for a narrower aperture (f/8-f/11), just remember that you'll need to adjust ISO or shutter speed accordingly. If you need to refresh your knowledge of the exposure triangle, read our guide to ISO, aperture and shutter speed.
Be aware that if the aperture is too wide, the depth of field will be too shallow and you'll only be able to see a small amount of raindrops in focus. Too narrow and the background will likely be too sharp and therefore distracting. You may need to play around with the aperture until you reach the desired effect.
You'll also need to balance of depth of field and shutter speed. A large aperture lets more light in which will enable you to maintain a fast shutter speed.
Shutter Speed
You'll need to change your shutter speed based on your creative goals.
- 1/500+: Allows you to freeze rain drops in mid-air so they are sharp and crisp.
- 1/160: This will show rain as streaks giving them a sense of motion.
- 1/60 or slower: Creates long, dramatic lines of rainfall.
White Balance
If your camera allows, set it to 'cloudy' or 'shade' to warm up the image. This should counteract the cool tones of rainy light helping prevent washed-out tones and keeping the colours natural.
You could also shoot in RAW and adjust the white balance in post.
Compositional Ideas for Rain Photography
As National Geographic photographer Sam Abell once said, 'bad weather makes good pictures'. Rain can transform landscapes and everyday scenes into something more dramatic so make sure to work with conditions rather than against them.
As there is no light to depend on, it becomes more important to get create and think of shapes or patterns that could make up the foreground of your image.
- Reflections: Look for puddles, wet surfaces, and glass for mirror-like effects.
- Textures: Rain enhances surfaces like leaves, stone, and wood.
- Silhouettes and Shadows: Moody skies offer strong contrast which is perfect for capturing silhouettes.
- Crowds and Umbrellas: Colourful umbrellas and busy streets can add interest to your photos.
- Backlighting: This can help illuminate raindrops and adds depth.
- Polarising Filter: Cuts glare and deepens reflections.
- Nighttime Scenes: Rain at night can create cinematic, neon-lit compositions.
Post-Processing Rainy Day Photos
Editing can elevate your rainy shots and bring out their full potential.
- Boost contrast and clarity to emphasise textures
- Adjust highlights and shadows for balance
- Add warmer or cooler tones to se the mood to your liking
- Remove distracting raindrops with spot-removal tools
Camera Insurance
Don't forget to protect your gear. Wet weather can make surfaces slippery and even with rain covers and weather-sealed lenses, accidents happen. With specialist camera insurance from Eversure you can peace of mind that if your camera suffers water damage, accidental knocks or theft when shooting, you'll be covered.
Final Thoughts
Rain photography challenges you to think creatively and adapt to changing conditions. With the right protective gear, settings and insurance, you'll be able to capture some really cool, atmospheric photos.